
Number, annotation and lists
Sequence number
Goal: name every opening uniquely – for plan, legend and schedule.
- When inserted, every opening gets the next free number of the drawing. A 2D/3D pair shares it – also after 2D → 3D ….
- The number is a property field ("Number"). To change it: click the opening and overwrite Number in the Properties palette – the partner gets the same. Text is allowed ("A3"); lists sort by the number in it.
- A copy (COPY) gets a new number so that none is duplicated.
- The annotation shows the number and follows every change; the legend combines identical openings with their numbers ("1-40, 52").
To assign all numbers again: Renumber.
Renumber
Goal: number all openings of the drawing 1, 2, 3 … without gaps – in order.
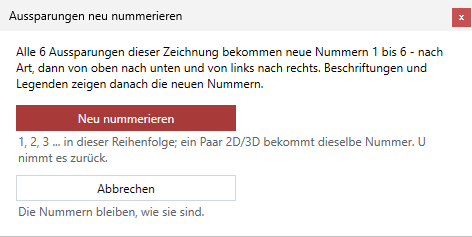
- In the palette under Annotation and legend click Renumber ….
- The confirmation states the number: "All n openings of this drawing get new numbers 1 to n – by type, then from top to bottom and from left to right."
- Renumber – or Cancel: the numbers stay as they are.
- The command line says "n opening(s) renumbered (1 to n)." Annotations show the new numbers; a legend is "outdated" afterwards.
The order: first by type (in the order of the list of types: wall opening, slab opening …), within a type from top to bottom, then from left to right in plan. A 2D/3D pair gets the same number. The whole thing is one undo step. Without any opening: "No opening in this drawing - nothing numbered."
Annotate
Goal: annotate an opening in the plan – with abbreviation, size, number or elevations; the annotation stays attached to it and follows it.
- In the palette click Annotate. The dialog box Annotate - choose template opens: at the top Automatic (the matching template), below it the templates in folders – by default the general ones and those of the openings. Show templates of all plug-ins removes the filter.
- Choose a template and OK (or double-click, Enter).
- Click the opening – 2D or 3D. Then click the place of the text.
Default templates of the openings (folder Openings)
| Template | Content | Example |
|---|---|---|
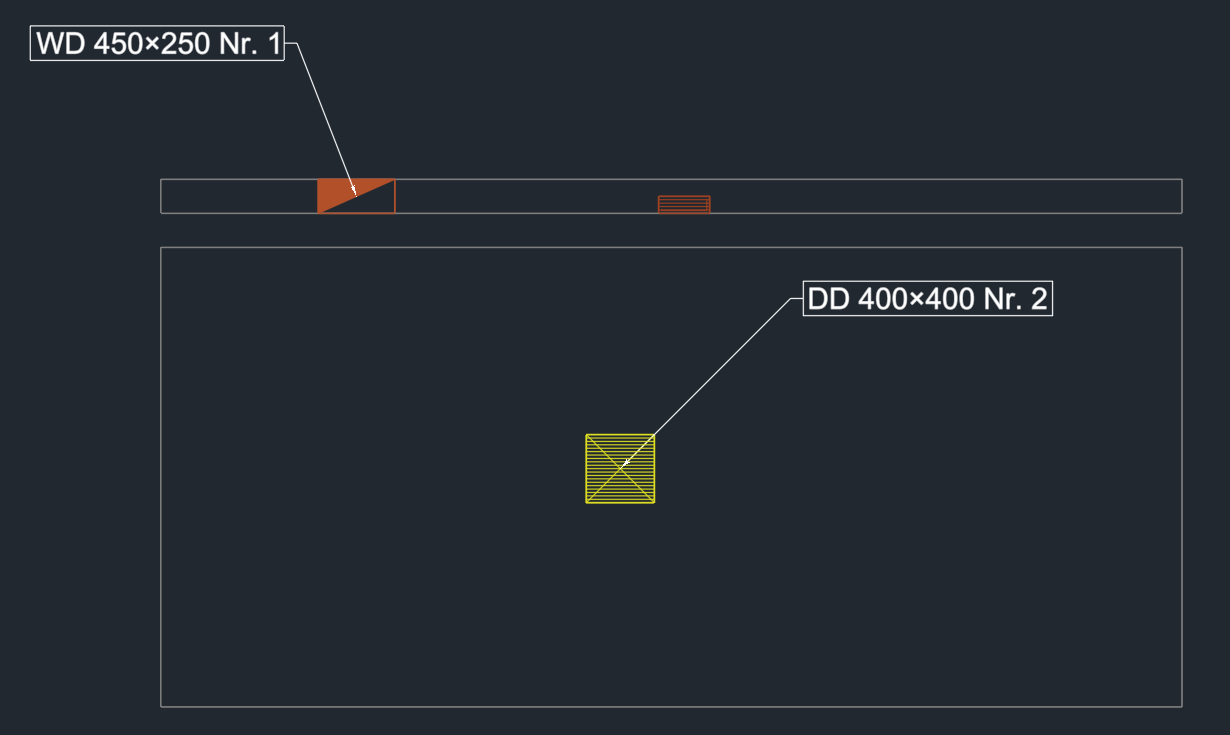
| Opening | abbreviation, size (wall width × height, slab/floor width × depth, round Ø) and number | WD 300×300 Nr. 3 |
| Opening with bottom/top | like "Opening", below it bottom and top of the 3D in m from the finished floor of its level (at the 2D from the linked 3D; without 3D only the first line) | DD 400×400 Nr. 5, below it bottom and top in m |
| Opening number | the sequence number in a circle | 7 |
The annotation stays attached to the opening and follows it when you move, copy and change it; the text recalculates (dimensions, number, elevations of the 3D). A later change to the template does not change annotations already placed. The look comes from the annotation style for openings (layer LuaCAD_BAU_Beschriftung Aussparung).
The other buttons
| Button | Effect |
|---|---|
| Templates … | The template editor: content, form, look and elevation reference of the annotations – fields such as {Kurzzeichen}, {Abmessung}, {Nummer}, {HoeheUK}, {HoeheOK}, {Gewerk}, {Bezeichnung}. Saved with OK; the templates apply to new annotations. |
| Multiple … | One template on many openings – see Annotating several. |
| Edit | Click an annotation (or select it first): change template, form or text – also by double-click. |
Check (update all annotations) and Reassign (give an annotation to another opening) are offered by the Annotation palette for all plug-ins. The template editor and the annotation styles in detail: Annotating in Piping 3D.
Annotating several
Goal: annotate many openings at once – for example all of one level.
- In the palette click Multiple … (with a preselection the selected ones apply).
- In the dialog box choose the template on the left, on the right which openings: a window, the clicked one together with its partner or the whole drawing, narrowed by the filter.
- OK. Each text finds a free spot with a short leader.
Every opening gets one annotation: for a pair at the 2D (the plan symbol), the 3D only if its 2D is not included. Everything together is one undo step; move single texts to their place afterwards with MOVE.
Editing an annotation
Goal: change template, form or text of a placed annotation.
- In the palette click Edit and click an annotation – or double-click the annotation.
- In the dialog box choose another template, form or an additional text, OK.
Only here does a placed annotation get another template – changes to the templates themselves affect only new annotations.
Legend
Goal: give the plan a table that shows which openings exist – counted and with their numbers.
- In the palette click Legend.
- The table hangs at the cursor; click the top left corner.
The legend has one row per discipline, type, abbreviation and size with the quantity and the numbers (as ranges, "1-40, 52"), at the bottom the total; over several drawings the column Drawing is added. A 2D/3D pair counts once. Without a discipline it says "no discipline" (last). The legend always goes into the drawing; it is linked to the openings – if something changes, "outdated" appears in the title until you update it. Columns, sorting and font are set in the list options.
Opening schedule
Goal: list every opening individually – as a table in the plan or as a file for the builder.
- In the palette click Opening schedule.
- Depending on the list options, LuaCAD asks whether the schedule goes into the drawing or into a file (by default every time).
- Into the drawing: the table hangs at the cursor, click the top left corner. Into a file: CSV or Excel according to the list options.
Every opening is one row: No., Abbreviation, Type, Discipline, Size, Bottom and Top (from the finished floor, only with 3D), Display (2D, 3D, 2D and 3D) and – if entered – Description. A 2D/3D pair is one row. Sorted by number, then by type. If a required field is missing, a note comes first ("Output anyway" | "Show parts").
List options
Goal: set where legend and opening schedule go and how they look.
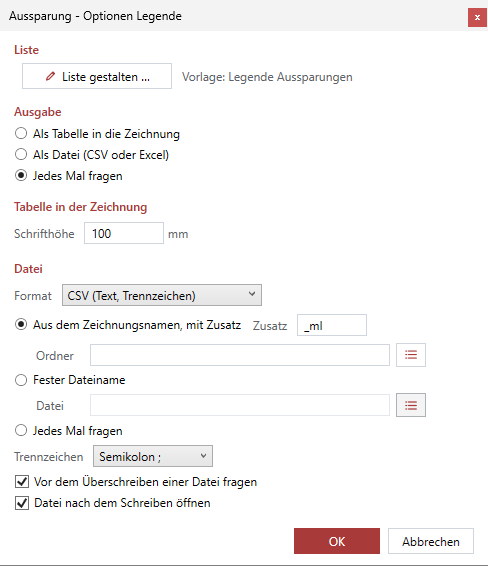
"…" next to Legend or Opening schedule opens the options of this list:
| Area | Setting |
|---|---|
| List | Design list … opens the list layout dialog box (columns, sorting, totals, filter, Excel template – with preview); next to it the template that applies. |
| Output | As a table in the drawing · As a file (CSV or Excel) · Ask every time. The legend always goes into the drawing. |
| Table in the drawing | Text height in the units of the drawing. |
| File | Format (CSV or Excel workbook), file name (from the drawing name with suffix and folder · fixed file name · ask every time), separator, ask before overwriting a file, open the file after writing. |
Every setting with its default: Reference › List options.
Update legend
Goal: bring inserted legends and opening schedules up to date.
- In the palette click Update legend. If tables are selected, only these; otherwise all legends and opening schedules of the drawing.
- The tables are recalculated with the openings as they are now; they stay in their place and on their layer. The command line says "n table(s) updated."
Tables of other plug-ins stay untouched. With many tables a progress window shows the state; Esc cancels. Without a table: "No legend of the openings in the drawing - insert a "Legend" first."
IFC and clash check
Goal: pass the openings on to others and check them against the pipes and ducts.
- IFC export: ribbon › LuaCAD tab › Exchange ribbon panel › IFC export writes the 3D openings as placeholders for an opening (IFC class IfcBuildingElementProxy, type PROVISIONFORVOID) with the dimensions with clearance, form and discipline, plus the property fields. 2D openings do not go into the IFC – convert them first with 2D → 3D ….
- Clash check: the Openings palette has no check of its own. Checking is done in the piping and duct plug-ins (for example Piping 3D, Output page › Clashes): a pipe that runs through a 3D opening is not a clash there; if it runs through a wall or slab of the IFC without an opening, the check reports "opening missing", if the opening is too small, "too small".