
Annotation
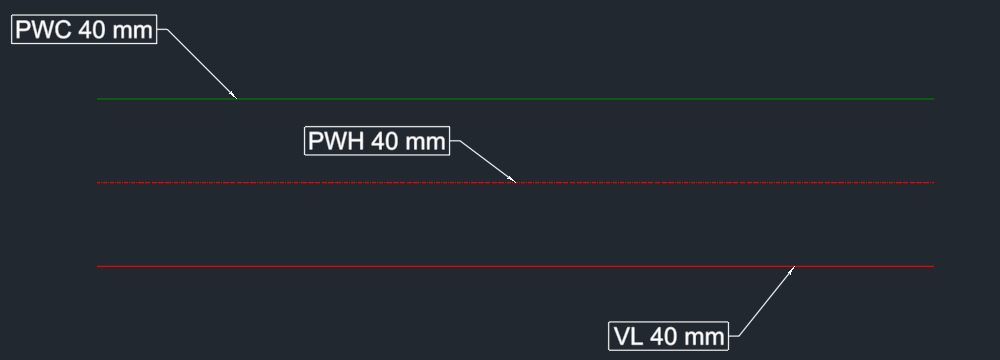
With the Annotation palette you write on every part of the drawing what the plan should show: system and size on a pipe, the dimensions of a duct, nominal size and slope on a drain line, the elevation of a centerline, the article number of a fixture, the layer of a plain line. What an annotation shows and how it looks is defined by a template – the default templates are supplied, sorted by discipline, plug-in and part type. The palette works across all plug-ins: Piping 3D, Piping 2D, Drainage 3D, Ventilation 3D, Openings, Floor Heating, blocks of the Block Library and objects that do not come from LuaCAD. Every annotation is a GstarCAD multileader; it stays attached to its part – when the part is moved, changed or generated again, the text changes with it.
How this help is organized
From overview to detail – read only as far as you need right now:
| Part | What you will find | For whom |
|---|---|---|
| Quick start | Annotate a pipe in a few steps and change the annotation afterwards – one picture per step. | Anyone placing their first annotation today |
| Concepts | Template and annotation style, the placed annotation and its snapshot, folders, "Automatic", forms, leader, free text, fields, elevation reference, layer, state. | Anyone who wants to understand how annotation works |
| Tasks | Every function of the palette and of the dialog boxes in detail: goal, steps, keys, options, example, notes – with a short video at the end. | Anyone who needs a particular function |
| Reference | All buttons, all keys, the gear menu, the dialog boxes, every setting in detail and the typical messages. | Anyone looking for something specific |
The tasks are ordered by work step: Templates, Annotation styles, Annotating and Editing and updating.
Overview
An annotation gets into the drawing step by step:
- On the ribbon › LuaCAD tab › Annotation opens the palette (also right-click in the drawing › LuaCAD › Annotation).
- At the top of the template tree click a template – or leave Automatic: then LuaCAD takes the matching template of the part when you click it.
- Click Annotate, click the part – the finished annotation hangs at the cursor.
- Click the position of the text – the annotation is placed; the next part is already expected.
- Finish with Enter. Multiple … annotates many parts at once.
- To change: Edit (or double-click the annotation). The look – font, height, color, layer, frame, mask – is in the annotation style (button at the right of every row of the tree).
| Page | What you will find |
|---|---|
| Templates | Choosing a template, searching and filtering, "Automatic", the template editor, new templates, content with fields, Calculate, form, leader, elevation reference, "Only if", "Part removed", filter, import and export |
| Annotation styles | Style of a template or of a folder, font, height, colors, lines, layer, background mask, picking values, copying and pasting styles, creating, renaming and deleting styles |
| Annotating | Annotating a part, switching the template at the cursor, free text, elevations and spot elevations, many parts at once |
| Editing and updating | Edit annotation, other template, Reset to template, Edit in CAD, double-click, grips, updating, Check, Reassign, part deleted |
The pages of the palette
The palette has one page. How a palette is laid out is explained in Getting started. At the top you find the name, the "i" of the page (a short explanation with "More in the online help") and the gear. Every button is listed in the Reference, every setting under Every setting in detail.
Annotation
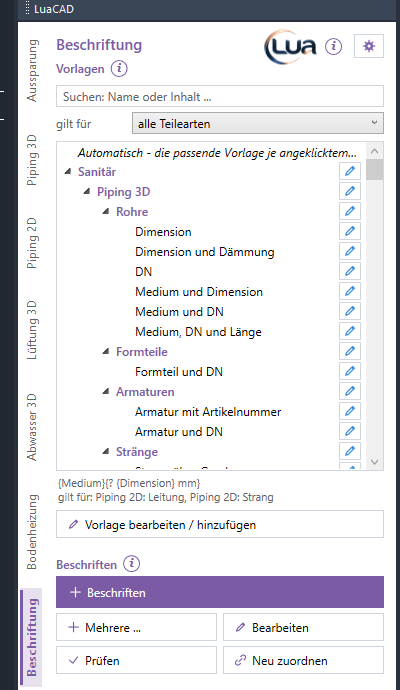
From top to bottom: the templates in a tree with folders, above it the search and the "applies to" choice, below it the content of the selected template and the button Edit / add template; then the Annotate section with the highlighted button Annotate (it inserts an annotation) and the buttons Multiple …, Edit, Check and Reassign. At the very bottom the status line: which template is selected and what happened last. Dimensioning and item numbers are found in the plug-ins (for example Piping 3D and Ventilation 3D).
Tasks: Choosing a template · Annotating · Multiple · Edit · Check · Reassign · All settings
Templates section
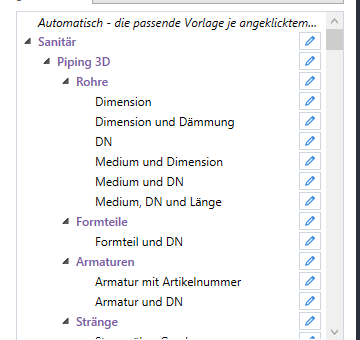
At the top the tree shows Automatic, below it the folders: discipline (Plumbing, Heating, Cooling, Ventilation, Process piping, Openings, General, Custom), inside it the plug-in (Piping 3D, Piping 2D, Drainage, Floor Heating) and inside that one folder per part type (Pipes, Fittings, Valves, Ducts, Risers, Elevations …). A click on a template selects it for Annotate and Multiple, a double-click starts Annotate right away. A click on a folder does not select a template – the line below only says whether the folder gives an annotation style. At the right of every row is the pencil style; right-click a row to copy and paste styles (also Ctrl+C / Ctrl+V). The search filters by name, content, description and folder, "applies to" by part type; while searching all folders are open. The folders you collapse stay collapsed.
Tasks: Choosing a template · Searching and filtering · Automatic · Template editor · Style of a template · Style of a folder · Copying styles
Annotate section
Annotate places an annotation with the selected template on a part you click (a template without a field becomes free text on no object). Multiple … annotates many parts in one step: a selection window, the network of a part or the whole drawing, with a filter. Edit changes one or several placed annotations, Check updates all annotations of the drawing and shows those without a part, Reassign attaches an annotation to another part.
Tasks: Annotating a part · Free text · Elevations and spot elevations · Multiple · Edit · Check · Reassign
Keys at the cursor
Annotation needs only a few keys at the cursor. The complete list is in the Reference.
| Key | Meaning |
|---|---|
| Click | step 1: click the part – step 2: click the position of the text |
| Template option (command line) | in step 2: choose another matching template (click it or type it) |
| Enter | in step 1: done |
| Esc | in step 2: back to step 1 (another part) – in step 1: done |
Shift and Ctrl are not used at the cursor; they belong to GstarCAD.