
Heated areas
A heated area is the surface in the room where the pipes lie. It is derived from the room and follows every change of it.
Edge distance
Goal: set how far the heated area stays away from the wall and from exclusion areas.
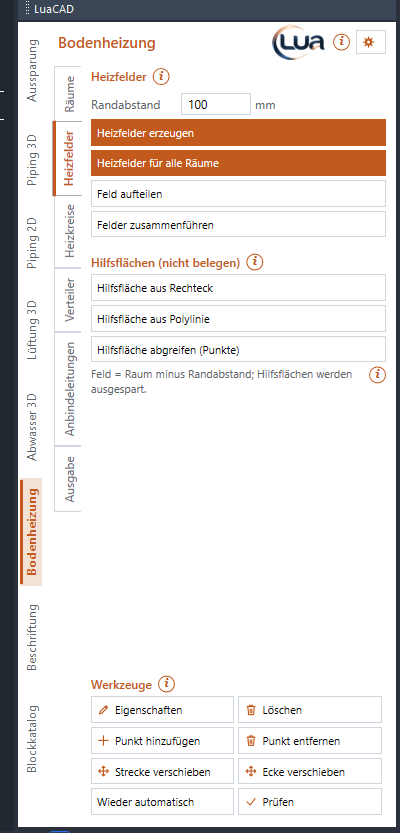
At the top of the Heated areas page is the edge distance (default 100 mm, 0 to 2000 mm). It applies to new rooms. Change the edge distance of an existing room with Change room (Rooms page) – if the room has heated areas, they are rebuilt.
Generate heated areas
Goal: create the heated areas of one or more rooms.
Steps
- Click Generate heated areas.
- Click into a room (or on its edge). The areas appear: room minus exclusion areas, offset inward by the edge distance. The command line shows count and area ("Room 1.01 Living: 1 heated area(s), total 18.24 m²").
- Next room right away; Enter finishes. One undo step per room.
If the room already has loops, they are re-placed in the new area with their values. Heated areas and loops by hand in this room become automatic again.
Heated areas for all rooms
Goal: rebuild the areas of all rooms of the drawing in one step.
- Click Heated areas for all rooms.
- Every room gets its areas anew; the command line shows count and area per room. The leaders are updated once at the end.
Unlike "Generate heated areas", areas and loops by hand stay as they are here.
Divide area
Goal: divide a large heated area into two (or more) areas – each with its own loops.
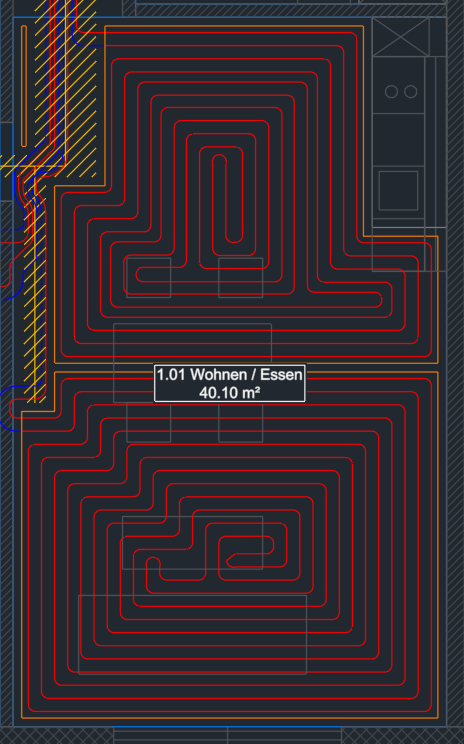
Steps
- Click Divide area. Before the first click the insertion help shows the procedure with a picture.
- Click the first point of the dividing line (1) – across the area, from wall to wall.
- Click the next point (2); further points make a bend. Z removes the last point.
- Enter or Esc ends the line – the area is divided. The line is extended to the wall (or to an exclusion area, another division); an end just short of the wall is enough.
- Next line right away; Enter without a point = finish.
Result: between the areas there is a joint as wide as the edge distance (3). The division belongs to the room and stays when the room changes; the area numbers stay. If you drag an area edge at the joint with a grip, the division moves along.
Join areas
Goal: remove a division again.
Steps
- Click Join areas.
- Click the first area ("1 of 2"), then the area on the other side of the division ("2 of 2").
- The division is removed, one area remains; its loops are rebuilt.
Exclusion areas
Goal: leave a spot in the room without heating – shaft, kitchen counter, built-in closet, shower.
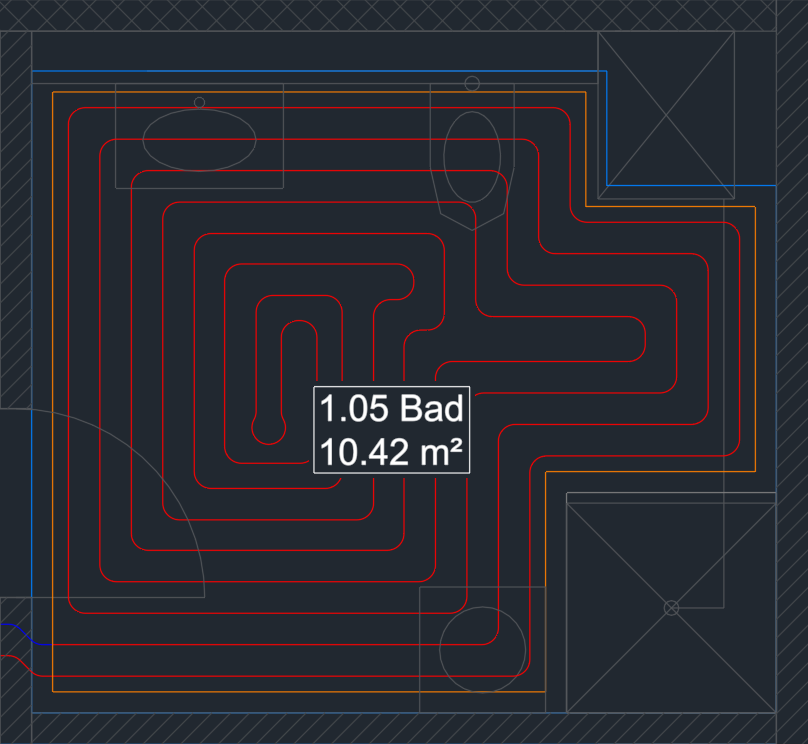
Steps
- Under Exclusion areas (not heated) choose one of the three buttons:
- Rectangular exclusion area – click two corners.
- Exclusion area from polyline – click a closed polyline; its outline becomes the exclusion area.
- Pick exclusion area (points) – corner by corner, Enter closes.
- The exclusion area belongs to the room it lies in. Its areas are rebuilt and leave it out with the edge distance; the loops run around it.
Heated areas by hand
Goal: adjust a heated area yourself when the automatic shape does not fit.
If you drag an edge or corner of a heated area with the GstarCAD grips (or change it with STRETCH or in the Properties palette), it becomes by hand: it stays that way even when the room changes; its loops are re-placed inside it. The command line says so ("Heated area … is now by hand").
Back to the automatic shape: tools › Automatic again – see Automatic again. "Generate heated areas" for this room also makes it automatic again, "Heated areas for all rooms" does not.