
Annotation concepts
Template and annotation style
Every annotation has two sources:
- The template decides what it shows and which form it has: the content with fields (for example
{Medium} {Abmessung}), the form (frame, circle, no leader …), the leader, the elevation reference and which parts it applies to. - The annotation style decides how it looks: font, text height, text color, color/linetype/lineweight of frame, circle, leader and arrow, the layer and whether the background is masked.
A template names its style; many templates can share one style. Supplied are the style Standard and one default style per discipline (Plumbing, Heating, Cooling, Ventilation, Openings, Process piping) and for the folder General the default style General – all the same (Arial, 125 mm, color 7, masked), only the layer follows the discipline (General: layer "General annotation").
Where to change what: content and form in the template editor, the look with the style button.
The placed annotation and its snapshot
When it is inserted, every annotation gets a snapshot of its template: content, form, leader, elevation reference (also the sea level elevation), "Only if", "Part removed", what it applies to, the effective annotation style and the language. From then on:
- It is attached to its object: values of the part (size, system, length …), its position and the levels used by the elevation reference follow. When the part is moved, changed or its 3D generated again, the text changes at the end of the command.
- It is no longer attached to the template: changing, deleting or moving a template, an annotation style or a folder changes no placed annotation – not when opening, not when updating and not with Check. New annotations take the new state.
- A new snapshot is only given in the dialog box Edit annotation: with Other template …, with Edit template … (afterwards the edited annotations get the template as it is now) or with Reset to template – always only for the selected ones.
Folders
The templates are kept in folders so that you find the right one quickly: first the discipline, inside it the plug-in, inside that one folder per part type – one annotation for every part. The default templates of Piping 3D and Piping 2D are under Plumbing and as their own copy with their own name under Heating, Cooling and General ("… (Heating)" …) – each copy is an independent template. Your own templates are in the folder you choose in the editor, otherwise under Custom.
| Discipline | Inside (examples) |
|---|---|
| Plumbing | Piping 3D (pipes, fittings, valves, risers, item numbers, elevations), Piping 2D (lines, risers, manifolds), Drainage (lines, stacks, fixtures, manholes, elevations) |
| Heating | Piping 3D and Piping 2D as a copy, Floor Heating (rooms, loops, manifolds) |
| Cooling | Piping 3D and Piping 2D as a copy |
| Ventilation | ducts, pipes, fittings, duct accessories, risers, item numbers, elevations (bottom, center, top) |
| Process piping | pipe spec, nominal size, system, material; item number with pipe spec |
| Openings | opening, opening with bottom/top, opening number |
| General | description, article number, item numbers, blocks and fixtures, other objects, elevations; Piping as a copy |
| Custom | your templates without a chosen folder |
A folder can pass its annotation style on to all templates below (check box Apply to all templates below): then it applies to all templates inside (also in subfolders), their own style rests until the check box is cleared again – see Style of a folder.
Automatic
Automatic is the first entry of the tree. When it is selected, LuaCAD looks for the matching template when you click a part: first those of the part's plug-in, then the general ones, then the rest; for Piping the copy of the discipline of its system (a heating pipe gets the template under Heating); among the default templates the first choice of the part type (on a pipe "System and size", on an elbow "Fitting and nominal size", on a duct "Duct dimensions"). If you already took another template on a part of the same plug-in in this session, that one comes first. See Automatic.
Forms
The form decides how text and leader look. All default templates come with a frame; circles and room tags have their own form.

| Form | Look | Typical for |
|---|---|---|
| text with leader | text on the leader line with arrow, no frame | notes, elevations without a frame |
| with frame | text in a frame, leader with arrow | pipes, ducts, fittings (default) |
| no leader | only the text, no arrow, no line – it stays attached to the part and follows it | text next to a line |
| box | text centered in a frame, no leader | room tags |
| circle | text in a circle, with leader | item number, number of an opening |
| divided circle | circle with a line between the first and the other lines, with leader | item number above the nominal size |
| circle, no leader | text in a circle without leader; several lines: the first at the top, the rest below | room tag as a circle |
"No leader" is also a multileader – the leader is only invisible; its tip stays the anchor on the part.
Leader
For forms with a visible leader the template decides how it runs to the text:
- landing at left, text at right (default): the landing sits at the clicked point, the text stands to its right; when the leader comes from the right or there is no space on the right, to the left.
- single vertical line, centered: one straight line without landing, the text centered above or below.
Free text
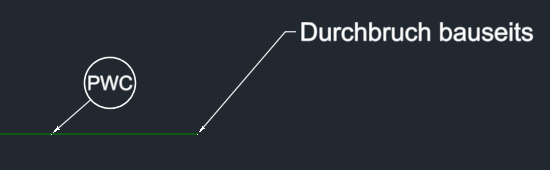
A template without a field (no {…} and no "Only if") is free text: it is attached to no object. Annotate then asks for no part – you pick the anchor point (arrowhead, with object snap) and the position of the text; with the form "no leader" only the position. Free text is never updated; a double-click opens the GstarCAD text editor.
Fields
The content of a template is text with fields in curly braces. When annotating, LuaCAD fills in the values of the part.
| Notation | Meaning | Example → result |
|---|---|---|
{DN} | the value as the catalog shows it | DN {DN} → DN 25 |
{Laenge:m:2} | with number format: unit and decimals | L = {Laenge:m:2} m → L = 2.50 m |
{? ({Daemmdicke:mm:0})} | the whole section is dropped when a field in it is empty | → (30) or nothing |
{=Laenge/1000:0.00} | calculates | → 2.50 |
{Feld:RAUM} / {Feldname:RAUM} | value or name of a property field | → Bath 2.01 / Room |
{HoeheAchse:m:2} | an elevation with the elevation reference of the template | → +2.40 |
{HoeheBezug} | the reference as text | → from FF GF |
{{ }} | a curly brace as a character |
A replacement text follows a vertical bar: {Hersteller|-} writes "-" when the field is empty. A line whose fields are all empty is dropped; empty lines are dropped. A {? …} section applies per line – it must not contain a line break. The editor lists the available fields at the right; double-click inserts one. See Content with fields.
Elevation reference
Elevations are templates of their own (folder Elevations per discipline). The template says what the value is measured from:
| Reference | Measured from | Example |
|---|---|---|
| absolute (from project zero) | ±0 of the drawing | +2.40 |
| from home level | a reference level of the level in whose height range the arrowhead lies (on the boundary the upper one) | +1.20 from FF 1F |
| from level | a reference level of a fixed level; empty = the level of the drawing | +2.40 from FF GF |
| above sea level | elevation above sea level: Z plus the sea level elevation of ±0 stored in the template | 432.50 a.s.l. |
The reference levels of a level: TOS = top of slab, FF = finished floor, BOS = bottom of slab, FC = finished ceiling. Values below the reference level always have a minus; with "Show plus sign" values above get a "+" (exactly on the reference level "±"). A single field can set its own reference: {HoeheUK@absolut}, {HoeheUK@UKRD} (home level), {HoeheUK@UKRD.EG} (fixed level). Levels and reference levels are kept in the project – see Elevations and references.

Layer
A new annotation goes on the layer its annotation style names. If it names none, the layer of the discipline of its default style applies (the annotation layers of plumbing, heating, cooling, ventilation, process piping and openings; for the templates in the folder General the layer "General annotation"), otherwise that of the discipline of the system or of the plug-in, finally the layer "Annotation" of LuaCAD. Example: a template under General › Other objects on a line of the drawing lies on "General annotation", a pipe template under Heating on a heating pipe on the annotation layer of heating. LuaCAD creates its layers itself; you change name, color, linetype, lineweight, plotting and on/off in the GstarCAD layer manager – the assignment stays. See Layers.
Background mask
By default every annotation masks the lines below it so that the text stays readable – on screen and in the plot. Without a frame only the area around the text, with a frame (frame, box, circle) the whole frame area, for a dimension the dimension text. LuaCAD uses GstarCAD's own means for this (background mask, WIPEOUT, DIMTFILL) and brings masking annotations to the front in the draw order.

State of an annotation
| State | Meaning | What to do |
|---|---|---|
| attached | attached to its part and updated | – |
| waiting | the 3D of the part is gone, its line still exists (for example after deleting the 3D); when the 3D comes back, it finds it | – or Reassign |
| orphaned | the part is deleted; the annotation is on the layer "Orphaned annotation" (not plotted) – or it went along, if the template says "Part removed: delete" | Reassign or delete |
| edited manually | the text was changed in the GstarCAD text editor and is no longer updated | Reset to template |
Check counts all states and selects the orphaned and the waiting annotations – see Check.