
Editing with the tools
The Tools are below every page of the palette. Properties, Delete and Automatic again act on the clicked object; the four tools in the middle apply to loops and leaders. Every tool runs in a loop – click the next object right away, Enter finishes.
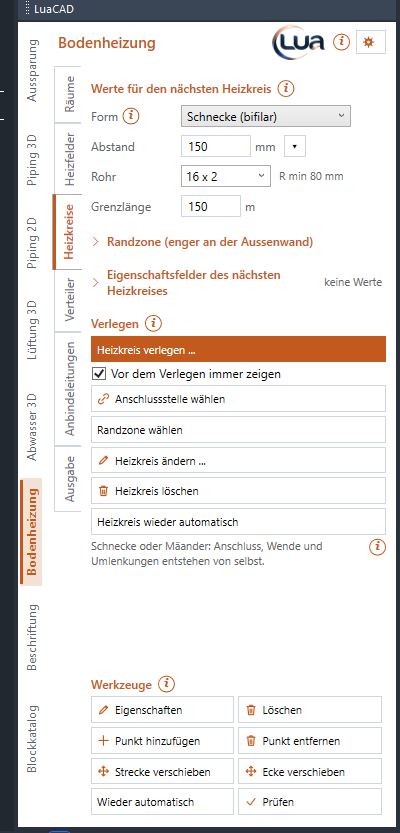
Properties
Goal: change the values of an object in the matching dialog box – whatever page you are on.
- Click Properties.
- Click an object:
| Clicked | What opens |
|---|---|
| Room | The Room dialog box – as "Change room". |
| Heated area, loop or its leader | The Loop dialog box of the area – as "Change loop". If the area has no loop, the command line says so. |
| Manifold | The manifold dialog box – as "Change manifold". |
| Leader corridor | Width, edge and length in the command line; change them with the corridor tools. |
Delete
Goal: delete an object of the plug-in – together with what belongs to it.
- Click Delete.
- Click an object:
| Clicked | What is deleted |
|---|---|
| Room | the room with heated areas, exclusion areas and loops |
| Loop or heated area | the loops of this area (supply and return); the area stays |
| Leader | the leaders of this loop (supply and return) |
| Manifold | the manifold; its loops go to another one if there is one |
| Leader corridor | the corridor; the heated areas are rebuilt |
One undo step per object.
Add vertex
Goal: give a loop or a leader a new corner – for example to avoid an obstacle.
- Click Add vertex.
- 1 of 2: click the loop or leader where the new corner should be.
- 2 of 2: drag the new corner and click. Space = free, A = type a distance.
The corners get bends with the bend radius; the partner (supply or return) gets a corner at its distance where that is unambiguous. Afterwards the loop or leader is by hand.
Remove vertex
Goal: take a corner away.
- Click Remove vertex.
- Click a corner of the loop or leader – it is removed, the neighbors are joined directly (with bends).
The ends and the turning bends stay ("This run has no corner there …").
Move segment
Goal: move a straight segment sideways – the neighbors get longer or shorter.
- Click Move segment.
- Click straight segments of loops or leaders (again = deselect) – or click next to the pipes and drag a window; Enter = selection finished.
- Move sideways and click – or press A and type a distance.
The bends move along, the partner follows at its distance. In a counterflow pattern the tool moves the whole edge of the loop – all rings on this side, supply and return; the segments at the connector point stay. How far is limited ("The edge goes at most … far …") so that the innermost rings do not get too tight and the pipes stay inside the area.
Move corner
Goal: drag a corner to another place.
- Click Move corner.
- 1 of 2: click a corner of the loop or leader.
- 2 of 2: drag the corner and click. Space = stay on a segment, A = type a distance.
The segments next to it follow, the bends have the bend radius.
Automatic again
Goal: have loops, heated areas or leaders drawn by hand rebuilt automatically.
- Click Automatic again. (If nothing in the drawing is by hand, the command line says so.)
- Click the parts drawn by hand – or click next to the parts and drag a window; parts selected beforehand already count.
- Enter = run. Loops are re-placed in their area, heated areas rebuilt from the room, leaders recalculated in the bundle. One undo step.
Check
Goal: find inconsistencies before you produce output.
- Click Check (the same as "Check rooms").
- The command line shows the counts and one line per finding, at the end the total. Details are in the log.
| Finding (excerpt) | What to do |
|---|---|
| Room …, loop …: n crossing(s) with the leader of loop … | Move the leader or draw it by hand; allowed in the insulation layer. |
| Loop …: leader (…) not connected – it ends … before the loop | Continue with "Single". |
| Loop …: leader (…) without a route – it ends … before the loop | Continue by hand or insert a leader corridor. |
| Loop …: supply and return are not a pair – … | Draw the missing pipe or reconnect. |
| … makes a loop-back | "All loops of a manifold" recalculates it. |
| …: supply and return cross – please redraw. | Redraw one pipe (unintended crossing). |
| Loop …: heated area changed – check the loop drawn by hand | "Automatic again" re-places it in the area. |
| Room …, heated area …: without a loop | "Place loop" or choose a connector point. |
| Loops / heated areas / leaders by hand: … | For information only. |
Editing with the GstarCAD commands
Goal: change parts of the plug-in with the familiar commands.
Rooms, heated areas, loops, leaders and leader corridors are polylines. Whatever you do to them with GstarCAD commands, the plug-in updates at the end of the command – in the same undo step:
| Object | Grips, STRETCH, Properties palette | MOVE, ROTATE, MIRROR, COPY |
|---|---|---|
| Room | areas and loops are rebuilt | see Editing rooms with GstarCAD |
| Heated area | becomes by hand; its loops are re-placed inside. An area edge at the joint takes the division along. | – |
| Loop | becomes by hand; the partner follows where that is unambiguous; corners get the bend radius. The end at the connector point stays. | with the room |
| Leader | becomes by hand (see Edit with grips) | – |
| Manifold | – | The leaders follow. |
| Leader corridor | change the centerline: surface and heated areas follow | centerline and surface move together; copied = a new corridor |
If a whole apartment with rooms, areas, loops and manifolds moves in one go (MOVE, ROTATE, MIRROR), everything stays as it was – nothing is rebuilt.