
Quick start: your first duct
This page shows the shortest way to a finished duct in 3D and the three most common changes afterwards. Each step has a picture; the details are in the linked tasks.
1. Open the palette and choose values
Ribbon › LuaCAD tab › Ventilation 3D. The palette opens at the edge of the drawing, the first time on the Ducts page.
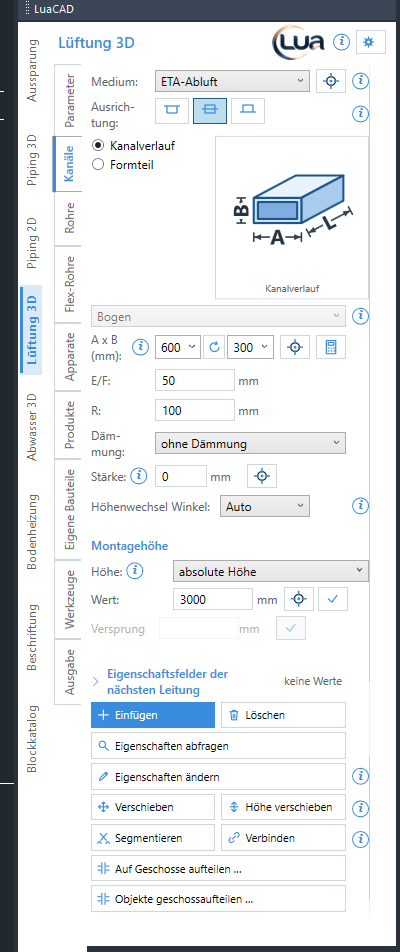
- Choose the system, for example supply air – it sets color and layer.
- Keep Duct run selected – LuaCAD then draws a whole run and adds elbows and reducers by itself.
- Type A x B or choose it from the list, for example 400 × 200 (A = width, B = height). You may calculate: "300+100".
- Insulation: keep "no insulation" or choose an insulation material – the thickness is proposed.
- Elevation: "from level", distance from BOS (bottom of slab), value −300 – the duct hangs 30 cm below the slab. Confirm with Enter or the check mark. What the value refers to (top, bottom or centerline) is set by the justification above.
- Click Insert.
Where ducts and fittings come from is set on the Parameters page; by default it is "EN 1505 / EN 1506 (made to measure)" – fine for a start.
2. Draw the duct
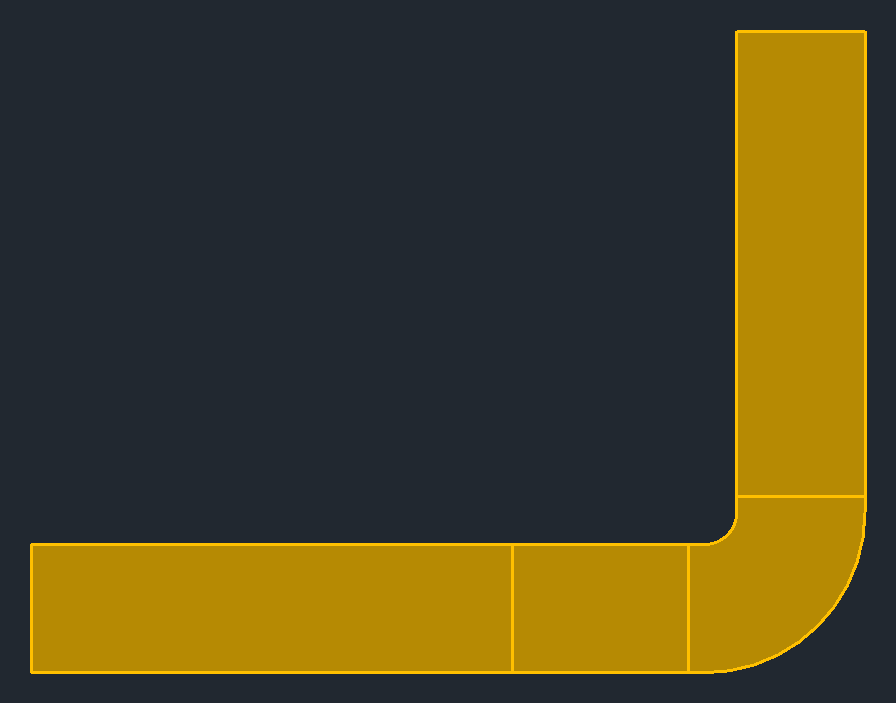
- Click the start in the drawing (1).
- Click the corners (2). An elbow is created at every corner. The Space switches between "snap to angle" (the increment of the Parameters page, 45° by default) and "free". A typed number is the length of the next piece.
- Click the end (3) and finish with Enter. The placed parts also stay with Esc.
3. Look at the result
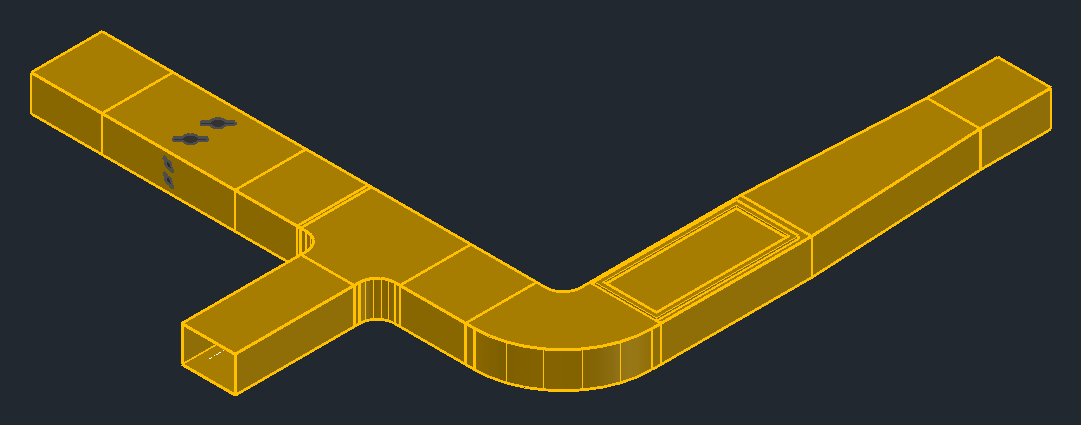
- Set the view to an isometric, for example with the ViewCube at the top right of the drawing.
- Long straight runs are divided into pieces – as long as the catalog fabricates ducts (Parameters page › Ducts).
- Every part carries system, size, catalog and material; it gets an item number by itself.
4. Change it with a grip
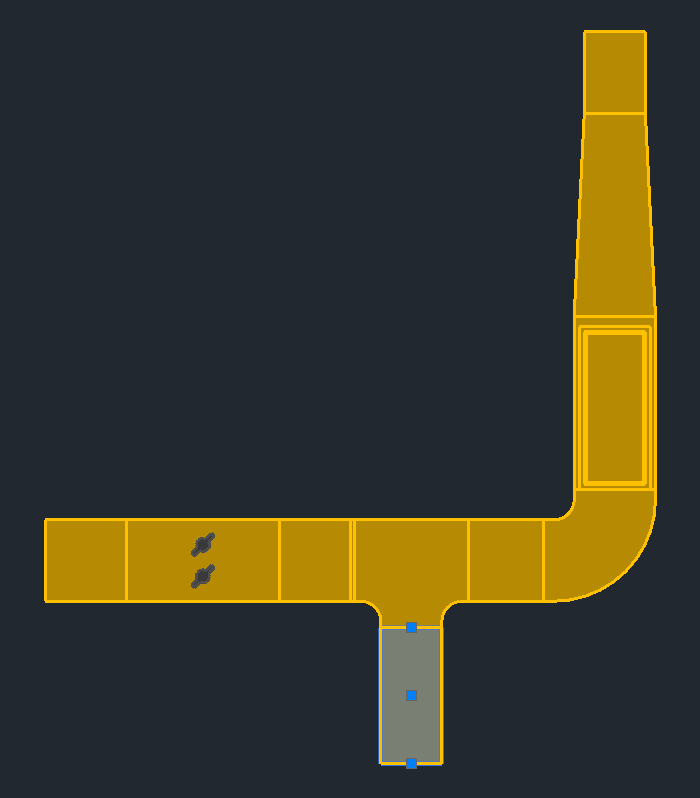
- Click the duct – grips appear at the start, middle and end of the straight run (duct section); an elbow or tee has a grip at its node.
- Click a grip, drag it and click at the new place. An open end makes the section longer or shorter, the middle moves it like "Move", the node moves the corner.
- The adjacent parts adapt at the end of the command.
5. Move
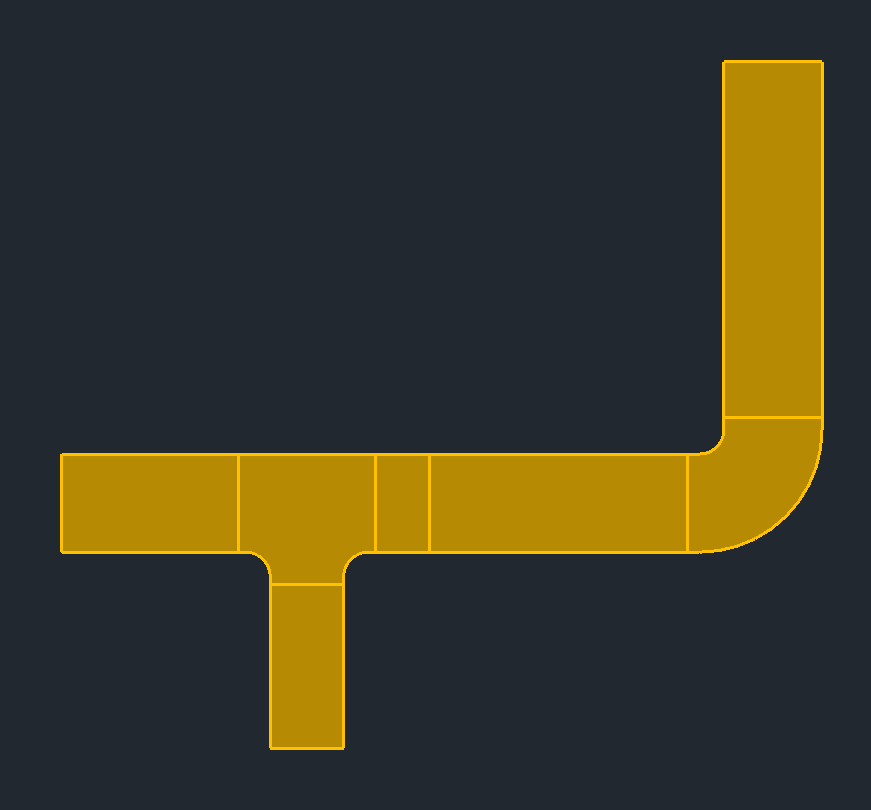
- Move (at the bottom of the page) and click the duct – in the picture the duct section after the elbow (1); Enter.
- Click the new position – or press A and type a distance, in the picture 500. Q locks the movement across the section, L along it.
- Adjacent straight ducts become longer or shorter (2); where that is not possible without an offset, an offset fitting is created.
More under Move.
6. Move elevation
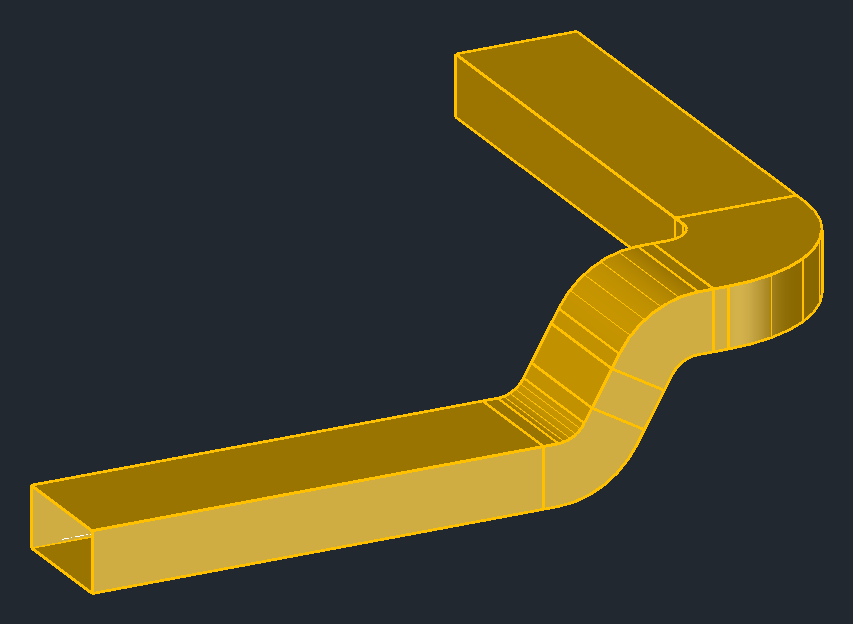
- Move elevation and select the duct; Enter.
- Press A and type the new elevation (absolute or from level) – or drag with the cursor in a side view.
- Up to the duct height an offset fitting makes up the difference, above that offset elbows.
More under Move elevation.
What next?
Video coming soon: Your first duct
- A round duct or a flexible duct to the outlet: Inserting a round duct, Inserting a flexible duct.
- A damper or a sound attenuator in the duct: Inserting a part in-line.
- A grille on the duct: Placing a grille, air valve or takeoff.
- Parts list and bill of materials: Output.
- Esc cancels every function; another button on the palette cancels the running command and starts the new one. U undoes the last step.