
Quick start: your first annotation
This page shows the shortest way to a "System and size" annotation on a Piping 3D pipe – and the most common changes afterwards. Every step has a picture; the details are in the linked tasks. A duct, a drain line or a block works exactly the same way.
1. Open the palette
On the ribbon › LuaCAD tab › Annotation. The palette opens at the edge of the drawing; if other plug-ins are already open, it appears as its own plug-in tab at the left of the palette.
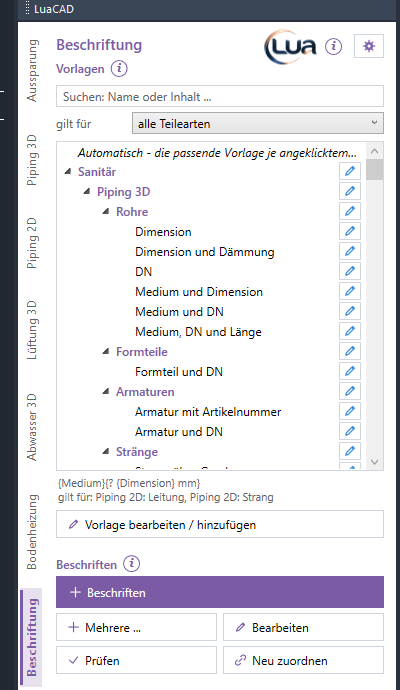
The drawing contains a Piping 3D pipe – for example a cold water line generated with Generate 3D (see Piping 3D quick start).
2. Choose the template
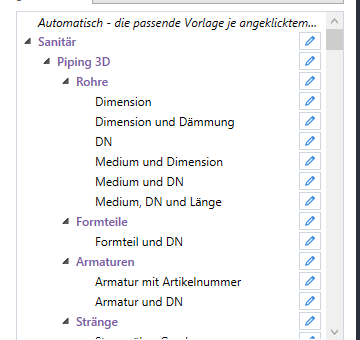
- In the tree expand Plumbing › Piping 3D › Pipes.
- Click System and size. Below the tree you see its content (
{Medium} {Abmessung}and "applies to: Piping"), the status line says which template is selected. - Without a choice – that is, on Automatic – LuaCAD also takes "System and size" for a pipe: it is the first choice for pipes.
3. Annotate: click the part
Picture coming soonPlan view, test drawing: the cursor as a pickbox over the pipe (1), the command line "Annotate … – 1 of 2: click the part …" (2)
- Click Annotate.
- The command line asks you to click the part ("1 of 2: click the part, also another object (Enter ends)").
- Click the pipe. It is highlighted, and the finished annotation hangs at the cursor – with a frame, in Arial, black/white, on the layer of the discipline.
4. Place the text
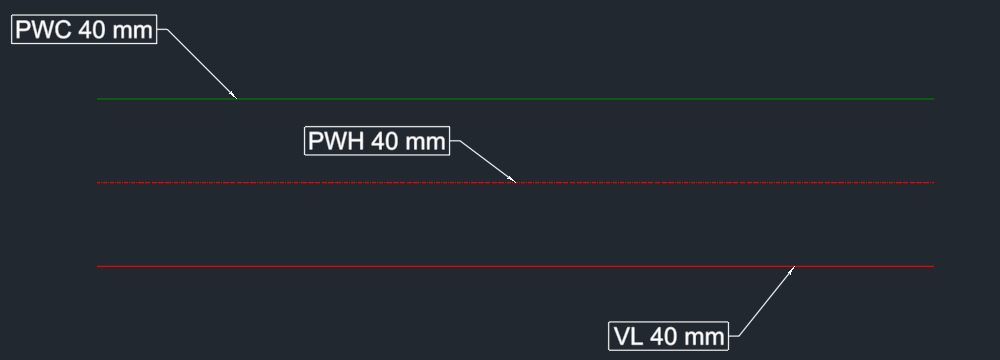
- The command line says "2 of 2: click the position of the text (Template: list by plug-in, Esc: another part)".
- Click where the text should be – the arrowhead stays on the pipe, at the point you clicked.
- The annotation is placed. LuaCAD already waits for the next part. Enter ends.
5. The result
Picture coming soonPlan view: the same annotation after moving the pipe – the text came along (1)
- Move the pipe with MOVE and the annotation moves with it; change its size in Piping 3D and the text changes at the end of the command.
- When the 3D is generated again, the annotation finds its pipe again.
- U undoes the placed annotation – each one is its own undo step.
6. Simple editing
- Move the text: select the annotation and drag the grip at the text – the arrowhead stays on the pipe. Dragging the grip at the arrowhead to another point of the pipe sets a new anchor point.
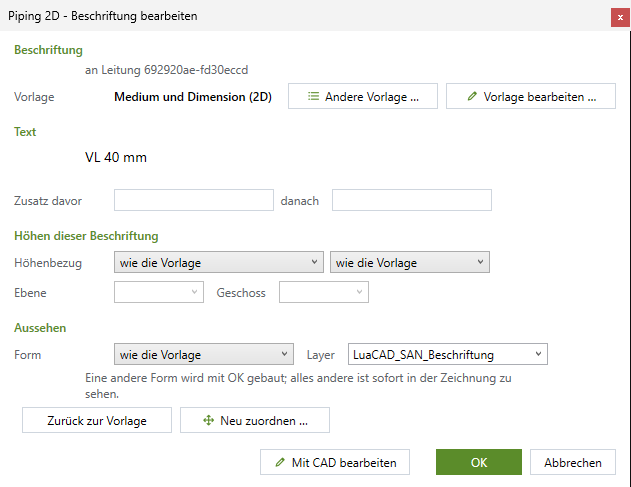
- Change: double-click the annotation (or Edit and click it) – in the dialog box choose another template, a prefix or suffix ("approx.", "(existing)"), the form or the layer. Every change is visible in the drawing at once; OK applies, Cancel restores.
- Delete with GstarCAD ERASE. If the pipe is deleted, the annotation remains on the layer "Orphaned annotation" (not plotted); Check shows it, Reassign attaches it to another part.
What next?
Video coming soon: Your first annotation
- Many parts at once: Multiple.
- Writing elevations: Elevations and spot elevations.
- A template of your own: Template editor.
- Another look (font, height, color, layer): Annotation styles.
- Another button in the palette cancels annotating and starts its own function.