
Block Library
With the Block Library you insert ready-made drawing parts as blocks: plumbing fixtures (lavatory, toilet, shower, bathtub …), symbols, light fixtures, fire protection signs, furniture, title blocks and borders. Every DWG of a library is a block. A fixture also brings its connectors – cold water, hot water and drain – which Piping 3D, Piping 2D and Drainage 3D connect to. The standard blocks are supplied; you keep your own blocks in your own folders or create them from a drawing with the block wizard.
How this help is organized
From overview to detail – read only as far as you need right now:
| Part | What you will find | For whom |
|---|---|---|
| Quick start | Place a lavatory against a wall and change it in a few steps – one picture per step. | Anyone inserting their first fixture today |
| Concepts | Block and fixture, standard blocks and custom blocks, 2D, 3D and "connectors only", connector set, base point, elevation, properties, layers, mirroring. | Anyone who wants to understand how the Block Library works |
| Tasks | Every function of the palette and of the action bar in detail: goal, steps, keys, options, example, notes – with a short video at the end. | Anyone who needs a particular function |
| Reference | All buttons per palette page, all keys, the gear menu, the dialog boxes and every setting in detail. | Anyone looking for something specific |
The tasks are ordered by work step: Inserting blocks, The library, Custom blocks, Fixtures and Blocks in the drawing.
Overview
A block gets into the drawing step by step:
- At the top of the palette choose 2D or 3D – this decides what you see and what is inserted. For Piping 3D and Drainage 3D: 3D; for Piping 2D: 2D.
- On the Library page choose a folder or search at the top; the Fixtures page lists all fixtures with connectors.
- Click a tile – the block appears in the preview window and below as the "selected block".
- Below, set what applies to the next block: connector set, properties, drainage routing, elevation and rotation, "insert connectors only".
- Insert … (or double-click the tile): the block hangs at the cursor; each click inserts one.
- Change placed blocks in the Properties palette or together on the Current Drawing page; the block extract is there too.
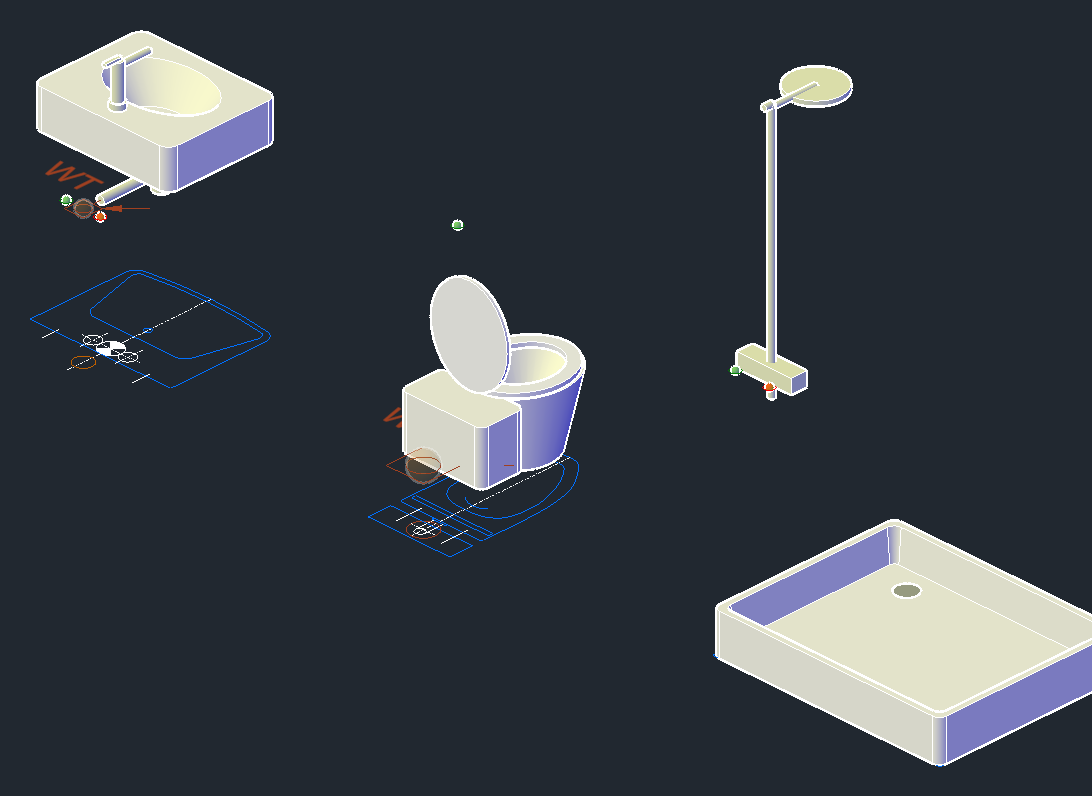
| Page | What you will find |
|---|---|
| Inserting blocks | Inserting at the cursor, base point, distance, rotating and mirroring, 2D and 3D, connectors only, connector set, elevation, properties of the next block |
| The library | Folder tree, tiles, search, preview, favorites and recent, adding and maintaining your own folders, scale factor |
| Custom blocks | Block wizard: turn objects of the drawing into a block or a fixture with connectors; editing the DWG |
| Fixtures | Standard fixtures, inserting against a wall, detecting fixtures in the plan, drainage routing, systems of the connectors, mirroring, changing the connector set |
| Blocks in the drawing | List of placed blocks, changing several at once, Properties palette, block extract, reloading a block, clashes, IFC |
The pages of the palette
Open the palette on the ribbon › LuaCAD tab › Block Library. Piping 3D, Piping 2D and Drainage 3D also open it with their button "Fixtures from the Block Library …" – then directly on the Fixtures page and with the matching 2D or 3D switch. How a palette is laid out is explained in Getting started. The title bar carries the name, the "i" of the page (a short explanation with "More in the online help") and the gear. Every button is listed in the Reference, every setting under Every setting in detail.
All pages except "Current Drawing" share the same layout: the 2D | 3D switch and the search box at the top, then the tabs, then the tiles and at the very bottom what applies to the next block.
2D | 3D switch
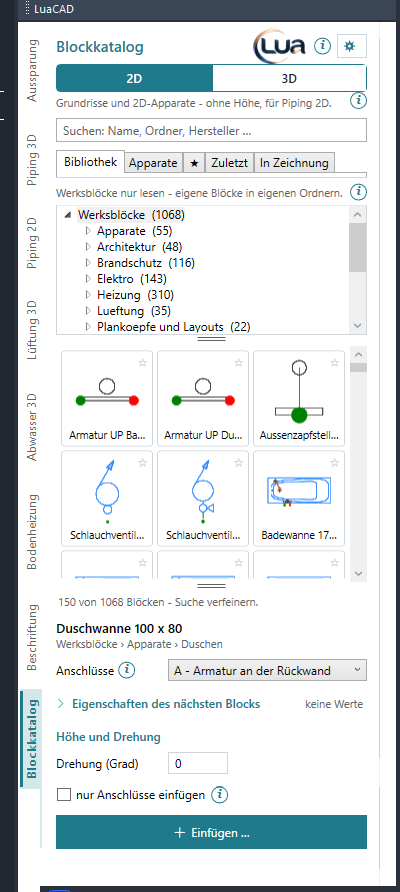
Right below the title bar. 3D shows the blocks with solids and inserts them with solids at their elevation – for Piping 3D and Drainage 3D. 2D shows the blocks with 2D parts (floor plans, symbols, title blocks …) and inserts them in the drawing plane; the connectors of a fixture are then colored marks for Piping 2D. The switch filters everything: folders, tiles, favorites, recent and the search show only what has something to show in that mode. A fixture with a solid and a floor plan appears in both, each with the picture of the mode. By default it is set to 3D; the choice is remembered.
Tasks: Inserting in 2D or 3D · Concepts 2D, 3D and connectors only · All settings
Library
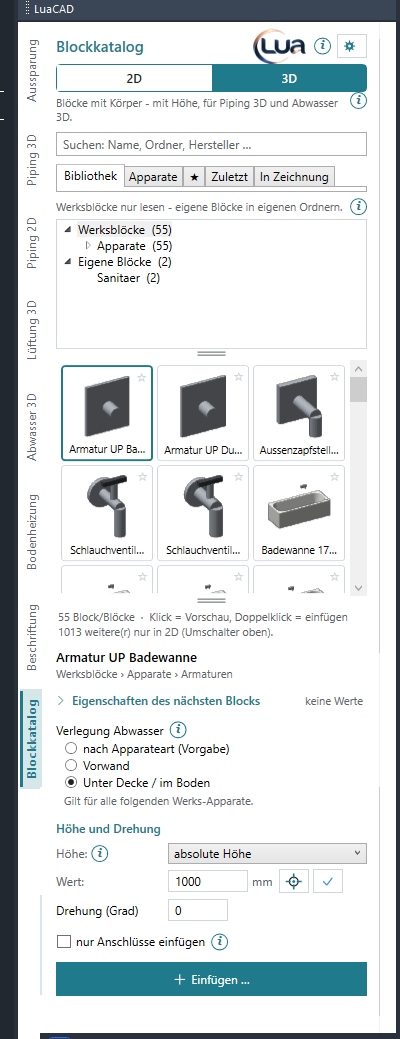
All blocks by folder. At the top of the tree are the standard blocks (supplied, read-only), below them your own folders – exactly as they are laid out in Explorer; the number after a folder counts the matching blocks in it and below it. A folder shows the blocks of all its subfolders in the tiles too. Clicking a tile selects the block and shows it in the preview window, a double-click inserts it, the star makes it a favorite. Tree and tiles can be made taller with the bar below them. Maintain folders with a right-click in the tree.
Tasks on this page: Finding blocks · Preview · Adding your own folders · Creating, renaming, deleting folders · Scale factor · Inserting a block · All settings
Fixtures
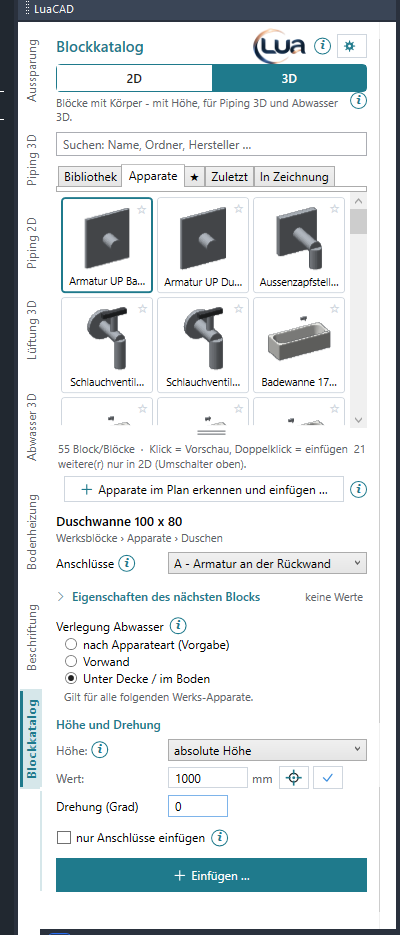
All fixtures of the library in one list, without a folder tree – these are the blocks from folders named Apparate: the supplied standard fixtures (lavatories, toilets, showers, bathtubs, urinals, bidets, kitchen, laundry, water heaters, valves, floor drain) and your own in a folder of that name. They bring water and drain connectors that move along when moving, rotating, copying and deleting. Here the connector set and the drainage routing apply as well. The button Detect fixtures in the plan and insert … finds toilets, lavatories, showers … in the architect's floor plan and places the standard fixtures there.
Tasks on this page: Standard fixtures · Inserting against a wall · Detecting fixtures in the plan · Connector set · Drainage routing · Connectors only · All settings
Favorites
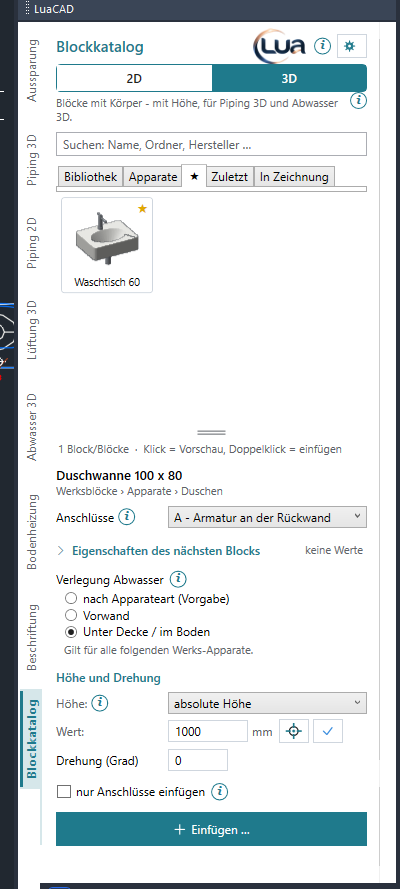
The tab with the star. It lists the blocks you have marked with the star on their tile – from all folders. A second click on the star takes a block out again. Inserting works as in the library; the 2D | 3D switch applies here too.
Tasks on this page: Favorites and recent · Inserting a block
Recent
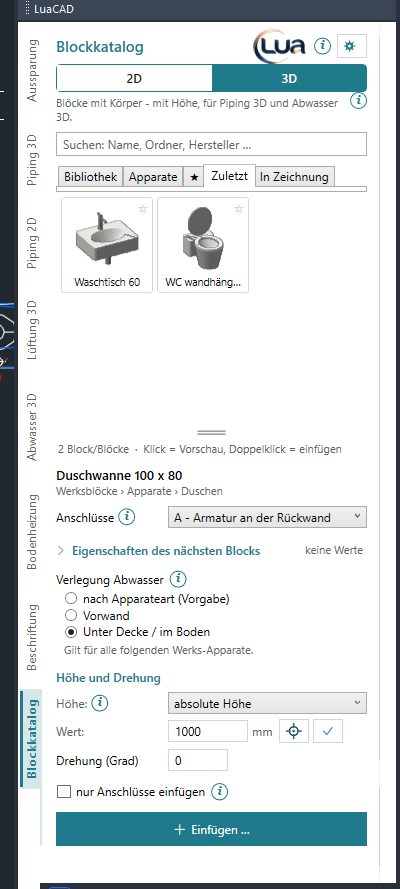
The blocks inserted last, from all folders, the newest first – at most 20. Inserting works as in the library; the 2D | 3D switch applies here too.
Tasks on this page: Favorites and recent · Inserting a block
Current Drawing
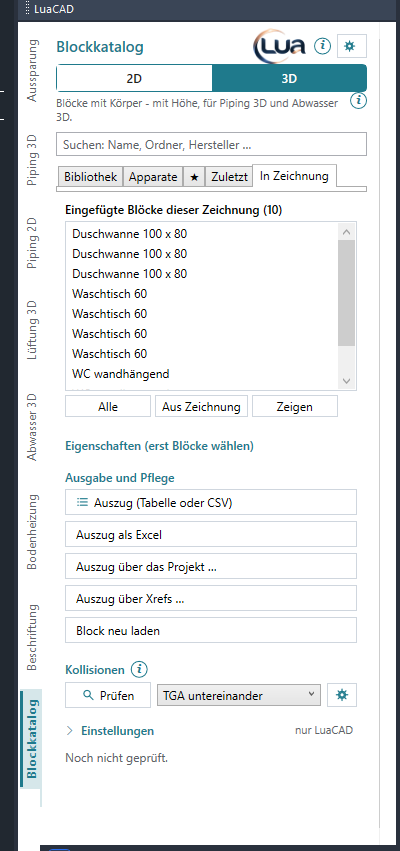
All blocks of the Block Library in the active drawing as a list ("name · room · level"); the search box at the top filters it. Select several with Ctrl-click or Shift-click – below them their common properties appear: equal values in the field, different ones gray. Changed fields go into all selected blocks with one click. Below that Output and maintenance (block extract as a table, CSV or Excel, also across several drawings; reload block) and the clashes. The "next block" part is missing here.
Tasks on this page: The blocks of the drawing · Changing several at once · Block extract · Across several drawings · Reloading a block · Clashes · All settings
The next block
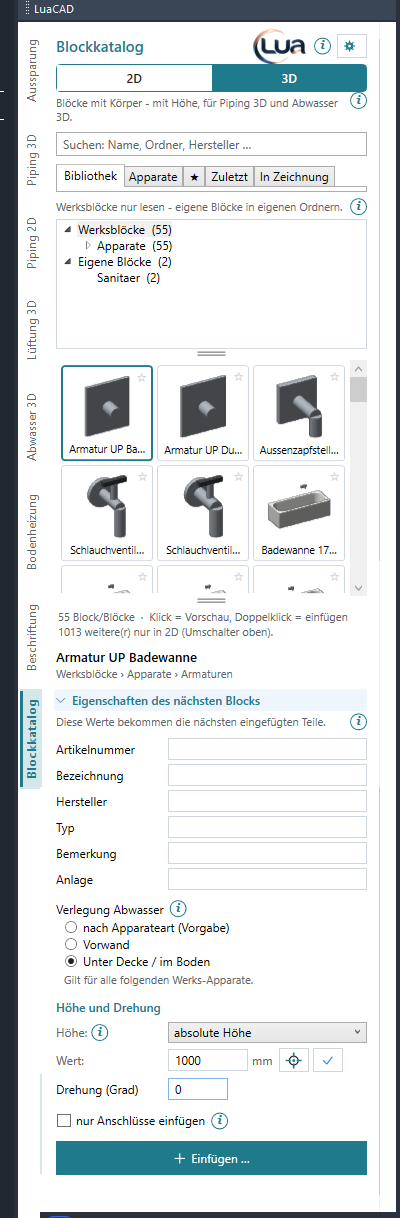
Below the tiles is what applies to the next block – the same on the Library, Fixtures, Favorites and Recent pages:
- Selected block: name and origin (library › folder › subfolder); if the folder has a scale factor, it follows.
- Connectors: the connector set – only for a fixture with several connector sets.
- Properties of the next block: expandable, collapsed when the palette opens ("empty" or "n filled in"). The values go to every following block.
- Drainage routing: where the drain of the next standard fixtures goes – only for fixtures and in 3D.
- Elevation and rotation: the elevation (3D only) as absolute, from level or free, plus the rotation in degrees.
- Insert connectors only: instead of the fixture only its connectors.
- Insert …: the selected block hangs at the cursor.
Tasks: Connector set · Properties of the next block · Drainage routing · Elevation and rotation · Connectors only · Inserting a block · All settings
Keys at the cursor
While a block hangs at the cursor, the action bar shows all keys that apply right now – to click or to press. In all plug-ins the same key means the same; the complete list is in the Reference.
| Key | Meaning |
|---|---|
| Space | show the base points – insertion point, corners, midpoints, connectors; a click takes one |
| G | free base point: click any point on the block (with object snap) |
| A | distance to a reference point, rotation and elevation in the same dialog box |
| R | rotate with the mouse |
| D | type the rotation angle |
| W | pick the angle with two clicks – for example along the wall |
| M | mirror left/right – fixtures keep cold water on the right |
| ← / → | rotate in steps of 45° |
| Enter | done |
| Esc | back to the palette – the inserted blocks stay |
The Help button in the action bar opens the help for the running function.