
Risers and connectors
Choosing a template
Goal: set what Insert riser/connectors inserts and with which risers parallel pipes run.
The list at the top of the Risers/connectors page has two groups:
| Group | Entries | What "Insert riser/connectors" does with them |
|---|---|---|
| ─ Risers ─ | the riser templates (by default one for heating supply/return and one for cold water, hot water and recirculation) | place the risers of the template as rise/drop symbols |
| ─ Connectors ─ | "single connector" and the connector templates (lavatory, toilet, shower, radiator …) | insert the connectors at the cursor |
The group headings cannot be selected. The tooltip of the list shows the content of the selected template. Parallel pipes always take the riser template chosen last – even if a connector template is selected afterwards; the line "With template: …" below "Parallel pipes" names it.
Inserting risers
Goal: place rise/drop symbols – the signs of vertical pipes – one at a time or as a row from a riser template.
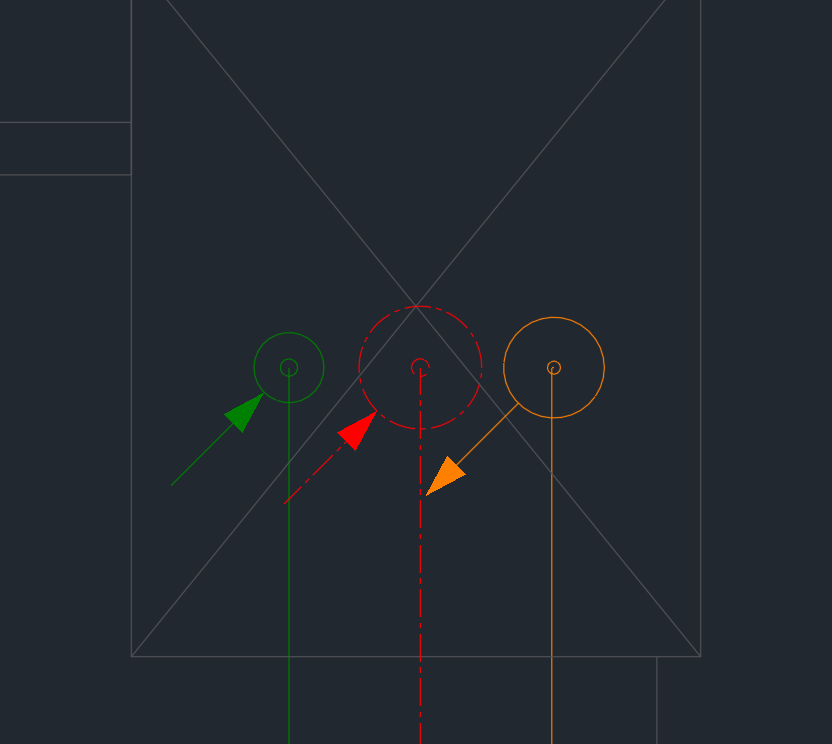
- Choose a riser template in the list and click Insert riser/connectors.
- With Show the dialog box before inserting checked (default) the template comes first: check or change risers, system, size, insulation, spacings and the direction (up, down, through, none) – this applies to this insertion only.
- The risers hang at the cursor. Drag them into place and click. Then the row hangs at the cursor again.
- Enter = finish. With the dialog box shown first, Esc at the cursor returns to the dialog box; only Cancel there ends the command.
Keys at the cursor
| Key | Effect |
|---|---|
| R | rotate the row by 45 degrees |
| Space | the next riser hangs at the cursor |
| W | pick the angle of the row with two clicks |
| D | type the angle of the row |
| A | distance to a reference point |
The circle of each riser follows its size (radius = half the size, without a size 50 mm); an insulated riser gets a second circle with the radius plus the insulation thickness. Pipes you start at the riser afterwards connect there.
Inserting connectors
Goal: place the connectors of a fixture – the points where pipes start later – without placing a fixture from the Block Library.
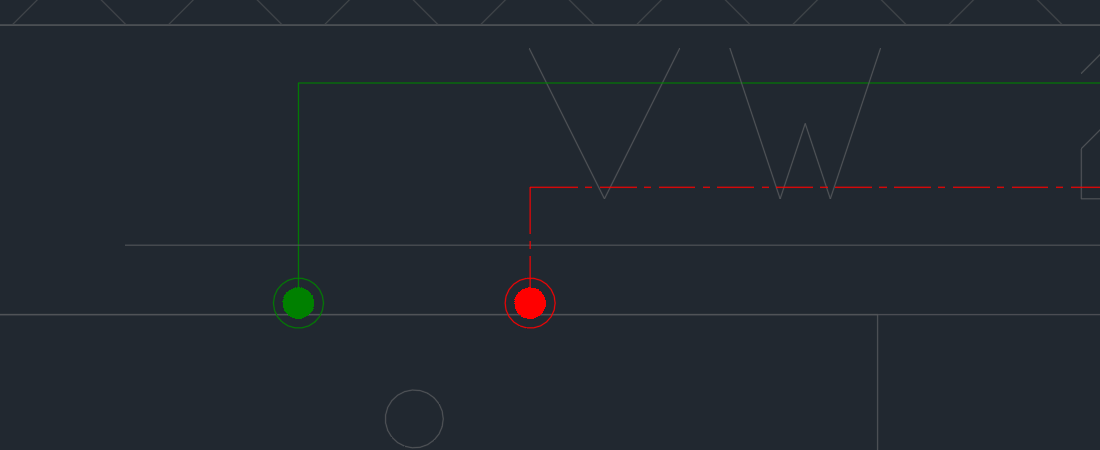
- In the list under Connectors choose "single connector" or a template (for example the lavatory) and click Insert riser/connectors.
- With Show the dialog box before inserting checked you first check the connectors (system, size, x/y to the insertion point, outlet direction, end type, text) – this applies to this insertion only.
- Click the insertion point (1). All connectors of the template come together; several form a set that MOVE moves as a whole – the pipes at it follow.
- The next set hangs at the cursor right away. Esc = back to the template or finish.
Keys at the cursor
| Key | Effect |
|---|---|
| Space | switch the base point |
| R | rotate |
| A | distance to a reference point |
The connectors lie on the system elevation of the palette. The marker has the color of the system (2). A pipe that starts at a connector takes its system (3).
Managing riser and connector templates
Goal: create your own templates – for example "Bathroom standard" with three risers or a double lavatory with four connectors.
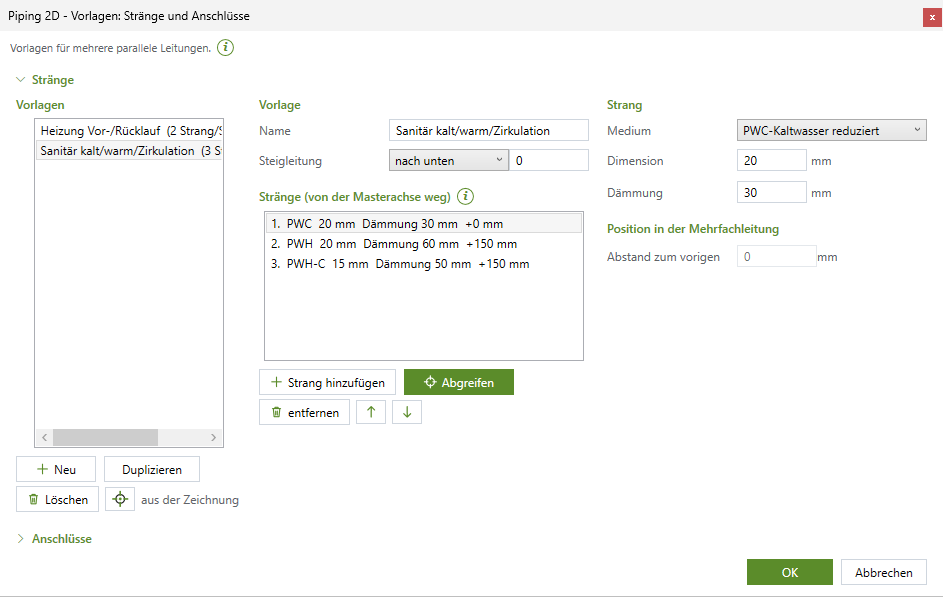
- Risers/connectors page › "…" next to the list. The section of the group selected in the list is open.
- Risers at the top: the templates on the left, in the middle name, direction, riser height and the list of risers (add, remove, move up, move down), on the right per riser system, size, insulation and spacing to the previous one. The first riser hangs at the cursor while drawing.
- Connectors at the bottom: per template the connectors with system (or role), size, x (along the wall), y (into the room), outlet direction, end type and text; plus New, Copy, Delete, From drawing …, Add default templates, Export … and Import ….
- OK saves both sections; the templates then appear in the list of the palette.
Options
| Button | Effect |
|---|---|
| from the drawing (risers) | a selection window over parallel pipes or rise/drop symbols – their risers become a new template |
| Pick (at the risers) | a selection window over rise/drop symbols or parallel pipes – their values and spacings replace the risers of this template |
| From drawing … (connectors) | select free connectors in the drawing and click the insertion point – they become a new template |
| Add default templates | brings back supplied connector templates whose name is missing in your list |
| Export … / Import … | pass connector templates on as an XML file – the same format in every plug-in |
Every setting: Reference › Templates.
Editing risers and connectors
Goal: change inserted risers and connectors afterwards.
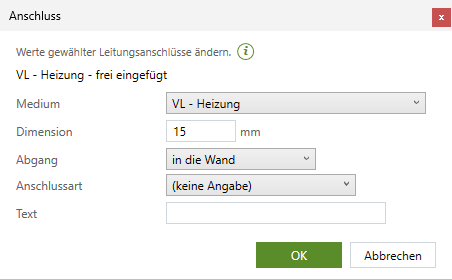
- Edit riser/connectors … (Risers/connectors page). Preselected objects apply once.
- What you click decides: a rise/drop symbol opens the Properties dialog box with system, size, direction and insulation; a connector (free or of a 2D fixture) opens the connector dialog box with system, size, outlet direction, end type, text and – in a set – the position x/y.
- Click into empty space and drag a selection window to take both: then one dialog box with the risers on the left and the connectors on the right.
- OK – everything in one undo step. Then the next one right away; Enter = finish.
To put pipes on another system elevation use Change system elevation in the tools.
Axis cross in the riser circle
The check box Axis cross in the riser circle (this drawing) draws a cross through the center of every rise/drop symbol. It applies to the whole drawing, the same in Piping 2D and Piping 3D, also to risers already inserted; new risers follow it. It is off by default. One U undoes the switch.
Fixtures from the Block Library
Goal: place a plumbing fixture with its connectors in the plan – or only its connectors at a fixture that is already in the plan.
- Fixtures from the Block Library … opens the Block Library on the Fixtures page with the insert mode 2D: the plan view of the fixture with its connectors.
- Connectors only from the Block Library … opens it the same way with the check box "connectors only": only the connectors, for example for a fixture from an architectural plan.
- Choose and insert the fixture as described for the Block Library. Pipes then start at the connectors with the right system.